3 Ways to Save OST File as PST in Outlook 2019, 2016, 2013
If you’re looking for a solution to save OST file as PST for Outlook 2019, 2016, 2013. Then, you have come across the right article. Here, we will provide all the reliable solutions to solve this query. So, go through with it.
Microsoft Outlook is capable of providing the feature to work in offline mode because it saves all Exchange mailbox information in a local system file, named as OST. The alteration or updates made by end users in offline mode gets updated to the server mailbox when Exchange connection gets re-established.
However, the OST file is located on PC itself, so, there are high chances that it gets affected. It can be happen due to the Exchange server crashes, system disasters, sudden mailbox deletions, etc. Therefore, the Microsoft users and administrators look for the solution to save.
This will be too much help when it is about restoring user mailboxes in occasions of hazardous event occurrence.
Related Article: How to Open Orphan OST File?
Why Need to Transfer Data from OST to PST?
- Restore some Exchange records that got mistakenly shift deleted from the server.
- Desire to create a backup of few Microsoft Exchange mailboxes for future purpose.
- Exchange users decide to rebuild OST file for dealing with the server issues.
- To continue business work even when EDB or OST files are inaccessible.
Just For Suggestion – Although the manual method is free of cost, they do not guarantee data integrity and security. Both of these factors can only be guaranteed by SYSDaddy OST File Converter Software.
Methods to Save OST File as PST Manually
Several approaches are available through which Microsoft customers can transfer OST file into Outlook 2010, 2013, 2016, 2019 PST format. But, in this post, we are going to demonstrate three popular approaches to perform this taask manually.
Quick guide here:
# 1: Using Import / Export Option
Simply perform the steps listed here and save ost file as PST in Outlook 2019, 2016, 2013, 2010, etc. By following step by step guide:
- Login to your Microsoft Outlook profile with Exchange tenant whose OST file is to be created.
- Click on Files option and then select Open & Export >> Import & Export
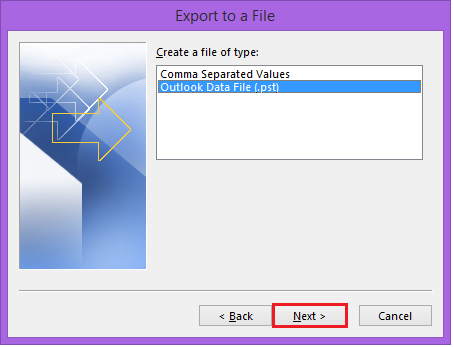
- This launches the Import and Export panel of Microsoft Outlook where you have to select Export to a file option. After this, click on Next
- Choosing Outlook Data File (.pst) option and then, clicking on Next
- Select the OST mailbox folder, which is to be exported in PST format and click Next
- Locate the system location where you desire to save resultant file. Make sure that you enable the radio button of ‘Do not export duplicate items’
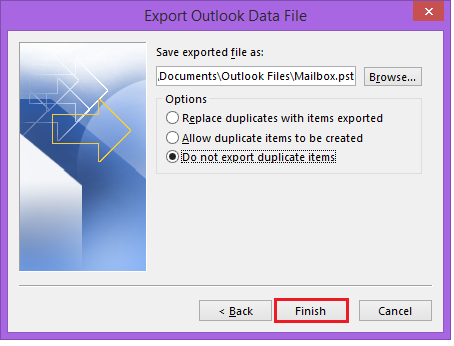
- Finally, click on Finish button.
Related Article: Solution to Fix Outlook OST File Cannot be Opened error
# 2: Use Archiving Option
When clients decide to use archive option of Microsoft Outlook, OST emails get saved in a distinct PST file. This option helps in maintaining the mailbox size at an optimum stage by step storing the old mailbox content in the archive folder. Well, go through the below mentioned instructions to develop the mailbox archive folder and locate it in PC at your desired path. Simply save OST file as PST manually by following step by step guide:
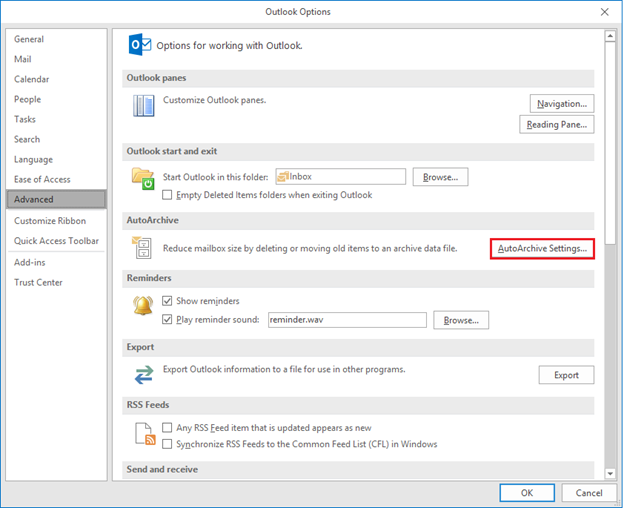
- Open Microsoft Outlook on your machine and click on File >> Options
- Go to the left-hand side of the panel, click on Advanced and then on Auto-Archive Settings button
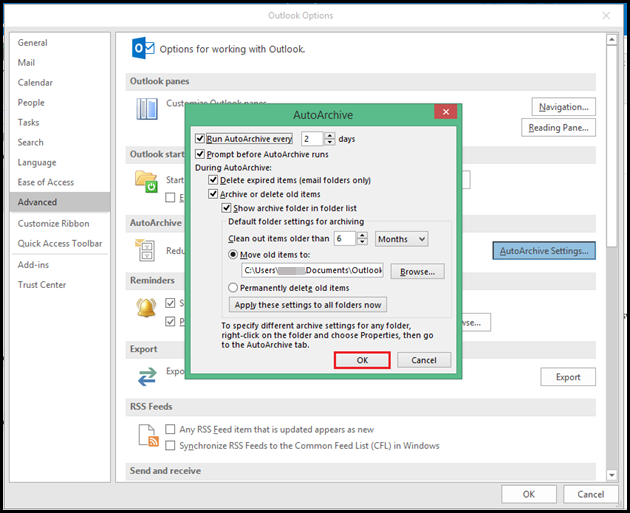
- Enter the total number of days for which you wish to use the auto-archiving feature of Microsoft Outlook. Read the facilities given in the ‘AutoArchive’ window and whichever you want to activate, you can enable them.
- Click on the Browse button to define the PC location where resultant archive PST is to be saved.
- At last, click on OK button to finish up with this method of converting data from OST to PST in Outlook 2019, 2016, 2013, 2010.
# 3: Drag and Drop OST Messages
This last approach to save OST file as PST manually that comprises of execution of following step by step guidelines:
- Open Microsoft Outlook email client and create a new PST folder in it
- Select OST file mailbox folders, which you desire to be saved in .pst format
- Simply drag and then, drop the selected folders in the newly created PST file.
Automated Way to Save OST File as PST Without Outlook
The manual solutions essentially demand the presence of MS Outlook connected with the Exchange server. Also, these do not guarantee that complete data of OST files with email attachments will be saved in PST format. If a situation where the OST file is corrupted, or there is no Exchange server available on the present machine then, all these free methods are useless.
Stressed? Lots of questions roaming in your mind, and unable to address the proper step-by-step solution to this problem?
Don’t panic, we have a rapid and guaranteed solution to your problem! SYSDaddy offers the best tool to accomplish this task. It flawlessly supports Exchange Outlook data files of any size and, smoothly exports mailboxes from OST to PST format for Microsoft Outlook. Microsoft clients can rely on this product if they want a surety of data integrity and security during the conversion.
Steps to Transfer Data from OST to PST File Format are;
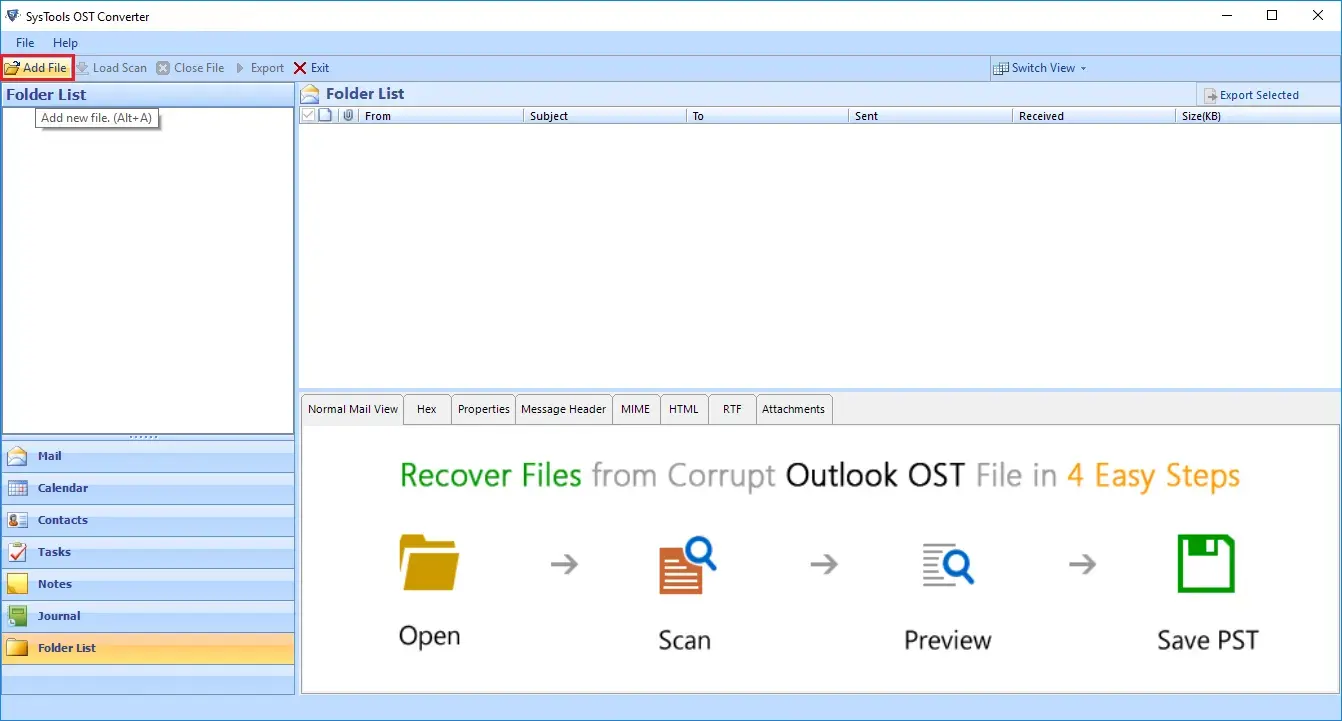
Step 1. Download and Install the Software on your Windows computer system.
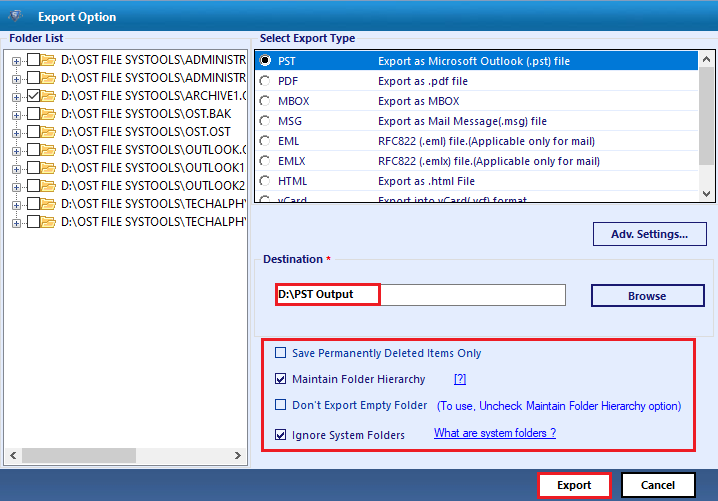
Step 2. Browse the OST file using software panel. You can browse healthy and corrupted OST file.
Step 3. Preview complete data before exporting into PST format. It will also recover deleted email from OST file.
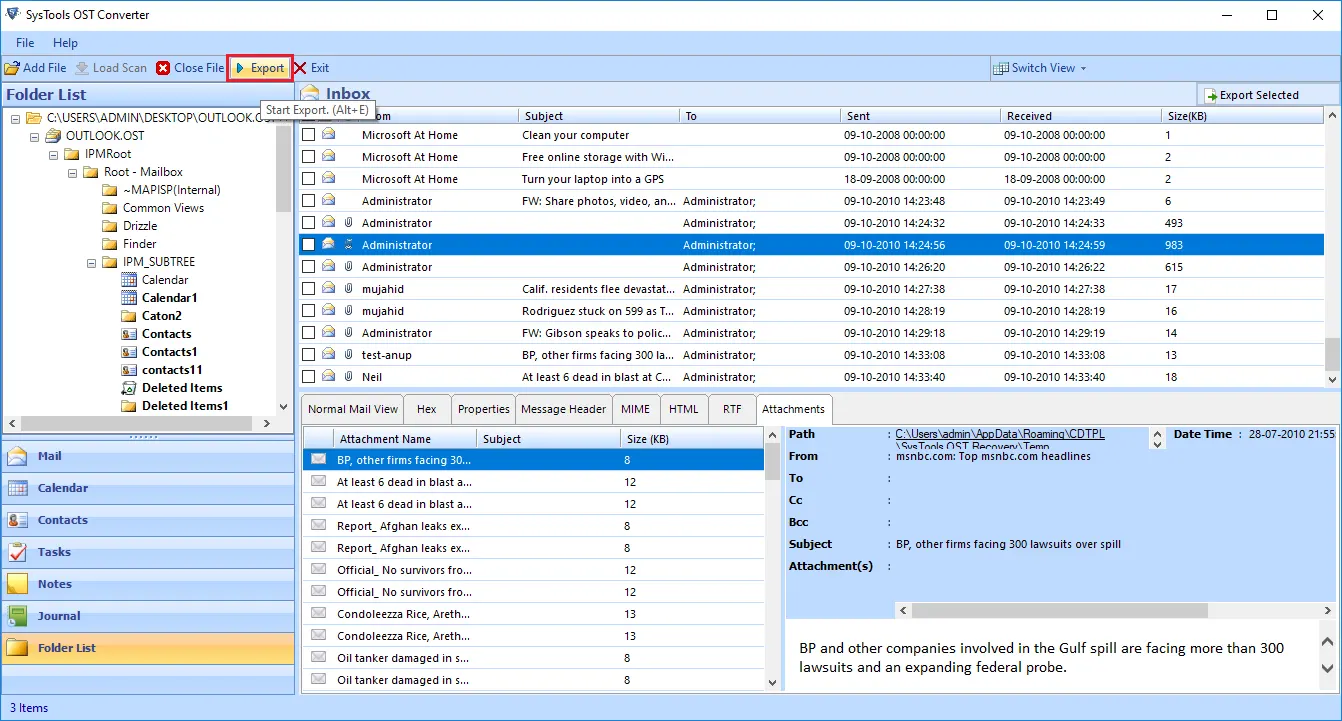
Step 4. Select PST file format and click on Export button to perform conversion.
Don’t Waste Time in Thinking, Just Implement It
In today’s digitization world, none of the businesses can compromise the security of their data. It means that even though it is about an Outlook file conversion, people have to be conscious of the best way. The automated solution recommended in this blog is tested by many Microsoft experts from different corners of the world, and then only mentioned here. I have explained the free manual solution to save OST file as PST in Outlook. The step-by-step guide is explained here. Simply perform the steps consciously and transfer data from OST to PST for free.